Printing Cards, Custom-Size and Heavy
Paper
Custom-size paper can be printed from Tray 1. For paper
specifications, see page A-2.
The maximum paper weight is 53 lb (199 g/m
2
) from Tray 1.
Note
Heavy paper and very small or very large custom-size paper should
be printed from Tray 1 to the rear output bin. Open the rear output
bin to use it (page 26).
The printer’s control panel can be set for one custom size at a time.
Do not load more than one size of custom paper into the printer.
When you print large numbers of small or narrow media and
standard paper, for best printing performance print paper first, then
the small or narrow media. To alternate paper and small or narrow
media, from the Configuration Menu in the printer’s control panel
select
SMALL PAPER SPEED=SLOW
.
For information on setting custom paper sizes, see page 40.
Tray
Minimum Size
Maximum Size
Tray 1
3 by 5 inches
(76 by 127 mm)
12.28 by 18.5 inches
(312 by 470 mm)
40
Chapter 2: Printing Tasks
ENWW
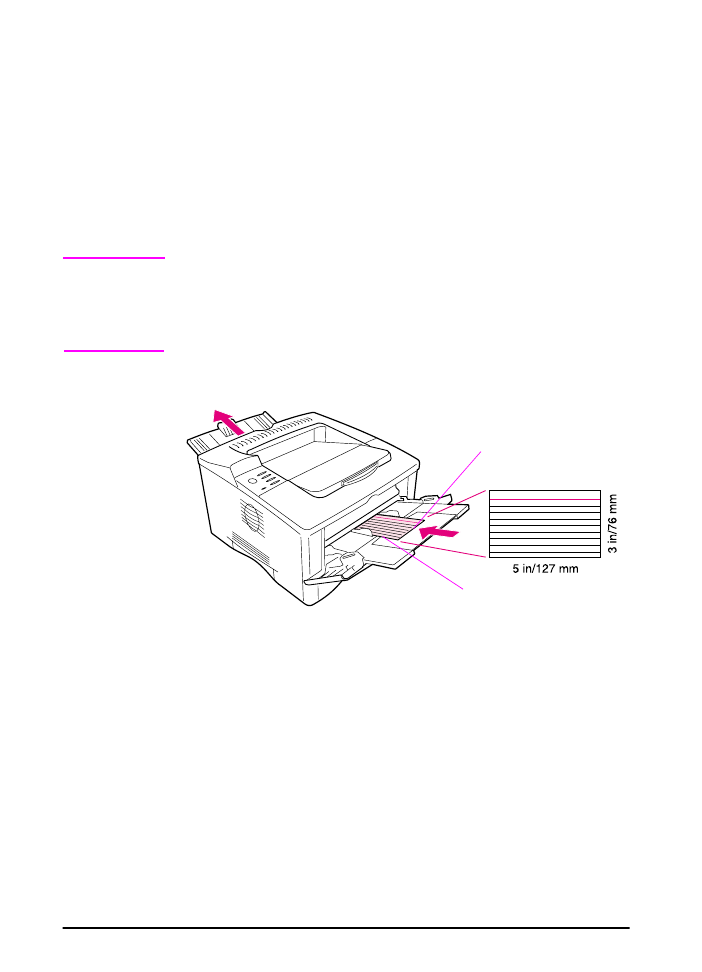
Guidelines for Printing Custom-Size Paper
•
Do not attempt to print on paper smaller than 3 inches (76 mm)
wide or 5 inches (127 mm) long.
•
Set page margins at least .17 inch (4.23 mm) away from the
edges.
Setting Custom Paper Sizes
When custom paper is loaded, size settings need to be selected
from the software application (the preferred method), the printer
driver, and from the printer’s control panel.
Note
All settings in the printer driver and software application (except
configuring custom paper sizes) override control panel settings.
(Software application settings override printer driver settings.) The
control panel must be set if the PCL 5e driver is used, or custom
paper is loaded long-edge first (X is longer than Y).
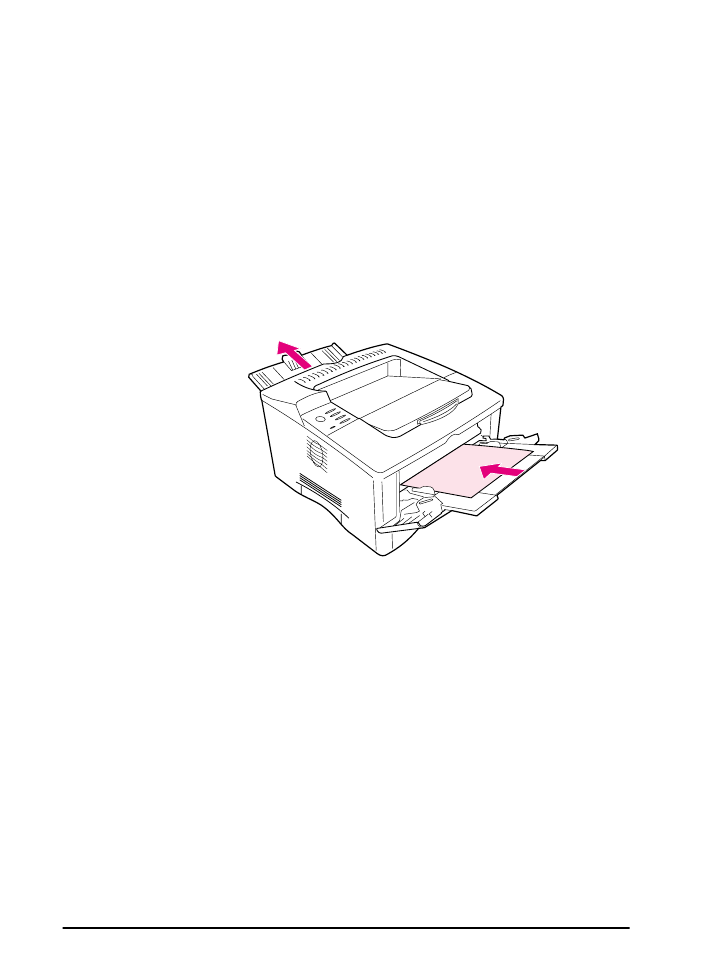
Figure 13
Printing Custom-Size Paper
X edge
Y edge
Tray 1

ENWW
Chapter 2: Printing Tasks
41
If the settings are not available from the software, set the custom
paper size from the control panel:
1 From the Printing Menu set
CONFIGURE CUSTOM PAPER=YES
.
2 From the Printing Menu, select inches or millimeters as the unit
of measurement.
3 From the Printing Menu, set the X dimension (the front edge of
the paper) as shown in Figure 13.The X dimension can be 3 to
12.28 inches (76 to 312 mm) for Tray 1. Set the Y dimension (the
side edge of the paper) as shown in Figure 13. The Y dimension
can be 5 to 18.5 inches (127 to 470 mm) for Tray 1.
4 If custom paper is loaded into Tray 1 and
TRAY 1 MODE=CASSETTE
,
then set
TRAY 1 SIZE=CUSTOM
from the Paper Handling Menu in
the printer’s control panel. See “Customizing Tray 1 Operation” on
page 45.
5 In the software, select Custom as the paper size.
For example, if the custom paper is 8 by 10 inches (203 by 254 mm),
set X=8 inches and Y=10 inches (X=203 millimeters and Y=254
millimeters).
42
Chapter 2: Printing Tasks
ENWW